
Course Breakdown: Emerald Vale holes 1-5
Emerald Vale is next up in our golf course breakdown series, and I’m especially excited for this one—it’s where my earliest golf memories were made. Aside from the Kingsley Club, Emerald Vale is actually the closest course to where I grew up. I could make it from my front door to their parking lot in about 15 minutes. Fun fact: the cart barn at Emerald Vale was also my first real job—the first one that didn’t involve my grandpa critiquing my every move.
The course itself features one of the best layouts in Northern Michigan, and I stand by that. There’s a lot of variety in the hole designs, with a balance of fun and challenge that keeps things interesting. The issue at Emerald Vale has always been inconsistent course conditions. When the weather cooperates, the course shines like an emerald—but with too much or too little rain, the conditions don’t quite match the quality of the design.
This breakdown is from the blue tees, which measure a little over 6,400 yards. The course is plenty wide, but if you stray into the hardwoods or long heather, Emerald Vale shows its teeth. So, the goal here is simple: help you make smart decisions to avoid the trouble spots and play your best round.
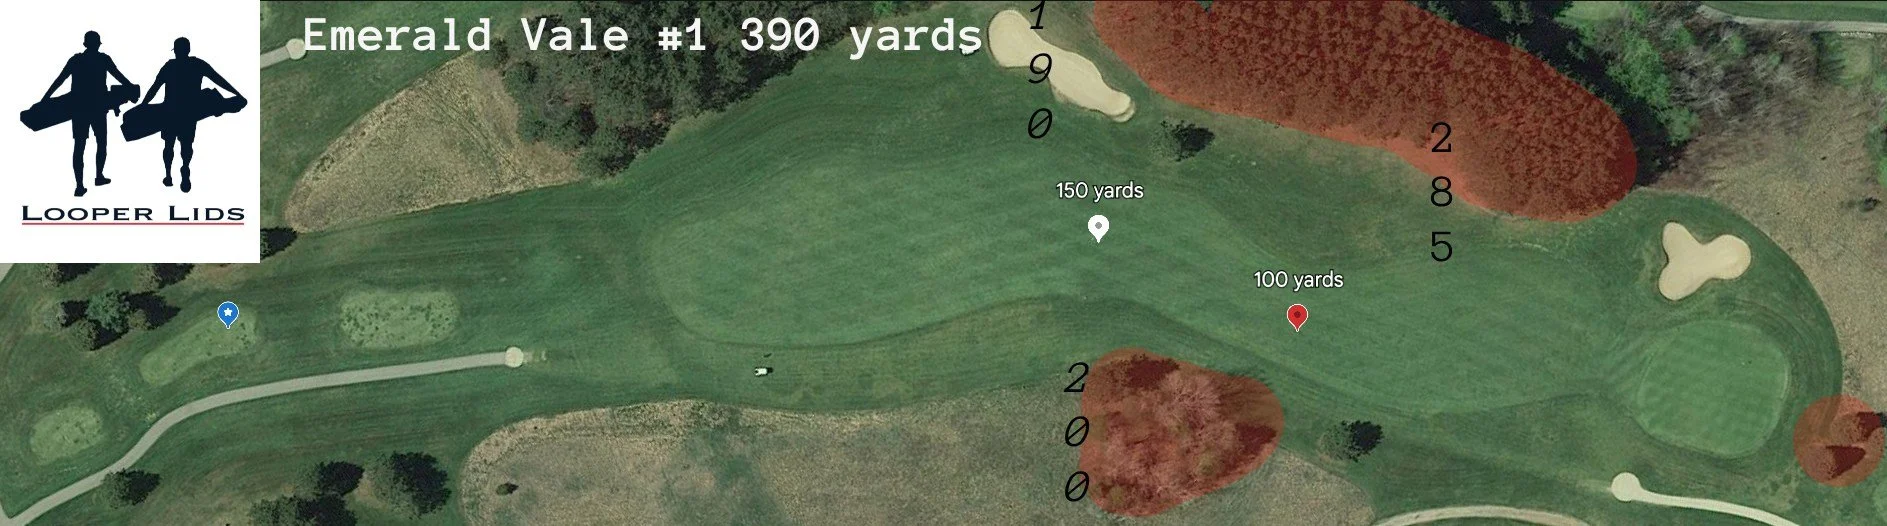
The opening hole at Emerald Vale is a slight dogleg right, with trouble looming on both sides of the fairway. Off the tee, the left bunker—right where the tee box points you—is just 190 yards out, with hardwoods trailing behind it. This is not where you want to miss.
On the right, a grouping of trees starts around 200 yards from the tee and continues to about 240. The ideal corridor off the tee is between the solo tree on the left (just right of the bunker) and that right-side tree line. Personally, I often find myself in the left rough—but that’s perfectly fine, as it still offers a good angle into a receptive green with no trouble short.
The green complex slopes from the front-left corner to the back-right, but since it sits well below the fairway, don’t expect much rollout on a well-struck approach. If you're between clubs, I’d lean short—better to be chipping from the front than flirting with the pine trees behind the green.

At 562 yards, the par-5 2nd at Emerald Vale demands three well-struck shots just to reach the green in regulation. It’s one of the toughest driving holes on the course because of all the trouble lurking in the landing zone.
The fairway is at its widest—32 yards—between 190 and 230 yards off the tee. But from there, it tightens dramatically, pinching to just 14 yards between two bunkers at the 240-yard mark. These bunkers aren’t just eye candy, either; they’ve got big, steep lips that limit your ability to advance the ball if you end up in one.
Go long and left, and you’ll find hardwoods that completely block your angle up the fairway unless you can shape a hard right to left shot. A miss right gives you a better angle—for a bit—until you're blocked by another stand of trees about 265 yards from the tee.
All of this adds up to a clear choice:
-Lay up short of 240 to the fat part of the fairway, or
-Get aggressive and take on all the risk.
Old, naive me? I used to blast driver and live with the consequences.
More mature, 31-year-old me? I’ll hit 5-wood off the tee, then another fairway club to try and get close to the 100-yard marker. I can’t count how many times I’ve messed up this hole by getting greedy and found myself 2 or 3 over after 2 holes and needing to par out to shoot under 40 on the front.
The hole slopes downhill and to the left almost the entire way—and it feels like it goes on forever. Trouble lines the entire left side, but things open up a bit on the right once you’re inside 200 yards.
The green is massive—45 yards deep—and they’re not shy about using all of it. It slopes right to left, so make sure you've got your yardage dialed in for your approach.
I’d argue this is one of the toughest holes at Emerald Vale. If you walk away with a par here, you’re definitely ahead of the curve.
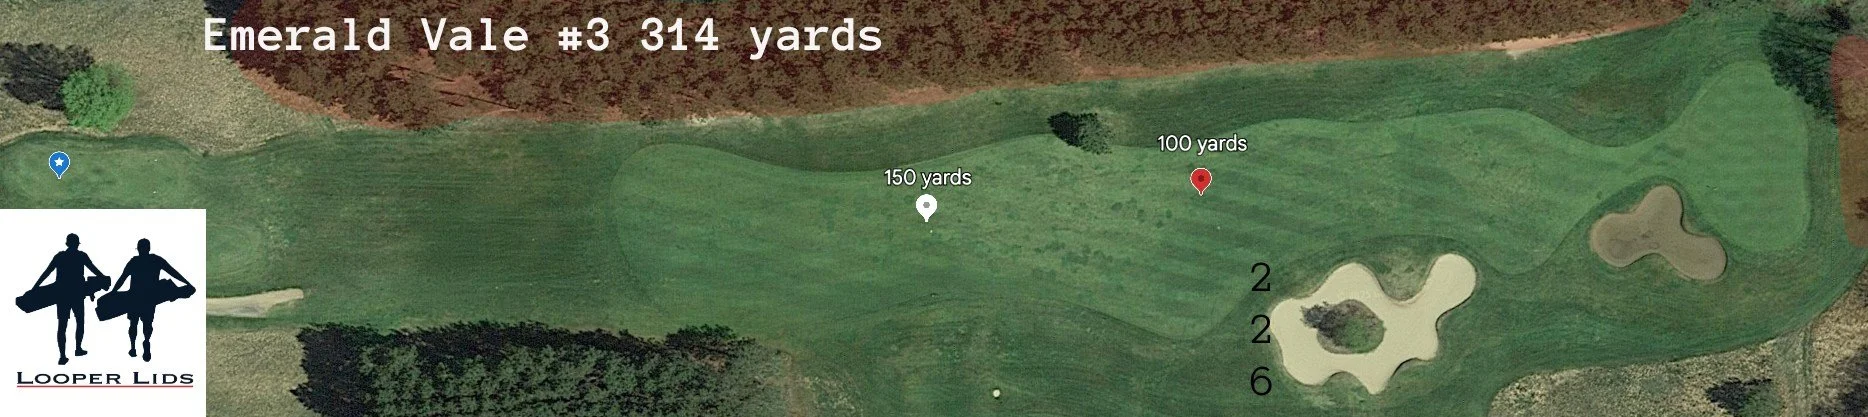
After the ass-kicking most golfers take on the 2nd hole, the short par-4 3rd is the perfect “get right” opportunity.
This is another hole where I leave the driver in the bag—and I’d recommend the same for anyone who can reach the right-side bunker at 226 yards. The left side is tree-lined with large pines, so it’s smarter to aim up the right side. If you miss, miss right—not left.
A smooth 200–220 yard tee shot will leave you with a wedge into an oval-shaped green. Just one major warning: you absolutely cannot miss long.
The only other bit of trickery comes from a subtle spine on the green that runs from the middle-left down to the front-left. If the pin is placed on or near this ridge, putting can get dicey. If you have to putt over it, tread carefully—speed control is everything.
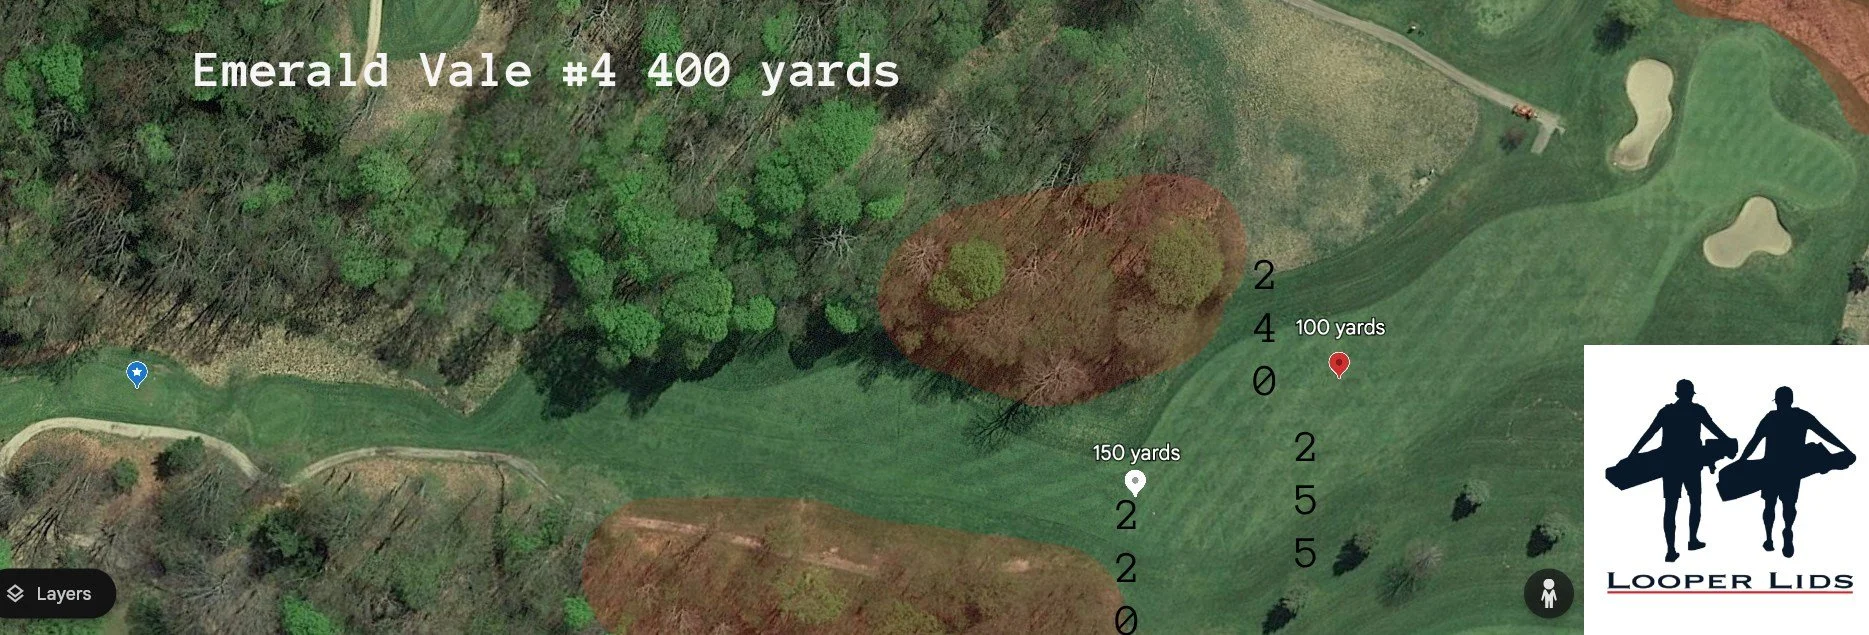
The tee shot on the tough par-4 4th hole is what makes or breaks your success here. It’s a dogleg left, but the turn doesn’t start until around the 220-yard mark. Before that, you're aiming straight down a narrow chute between trees that line both sides of the fairway.
A dead-straight shot runs out of room at 255 yards, so a right-to-left ball flight is definitely preferred. The key is simply to make it past the dogleg—do that, and you can survive from there.
Big hitters can take aim over the left corner, but be warned: you’ll need to carry the ball at least 240 yards, and that shot has to clear an 80-foot tree. It’s high-risk, moderate-reward.
The green is fairly large with a few distinct sections, but the center works well for just about any pin placement. And like most holes at Emerald Vale, short is a better miss than long.
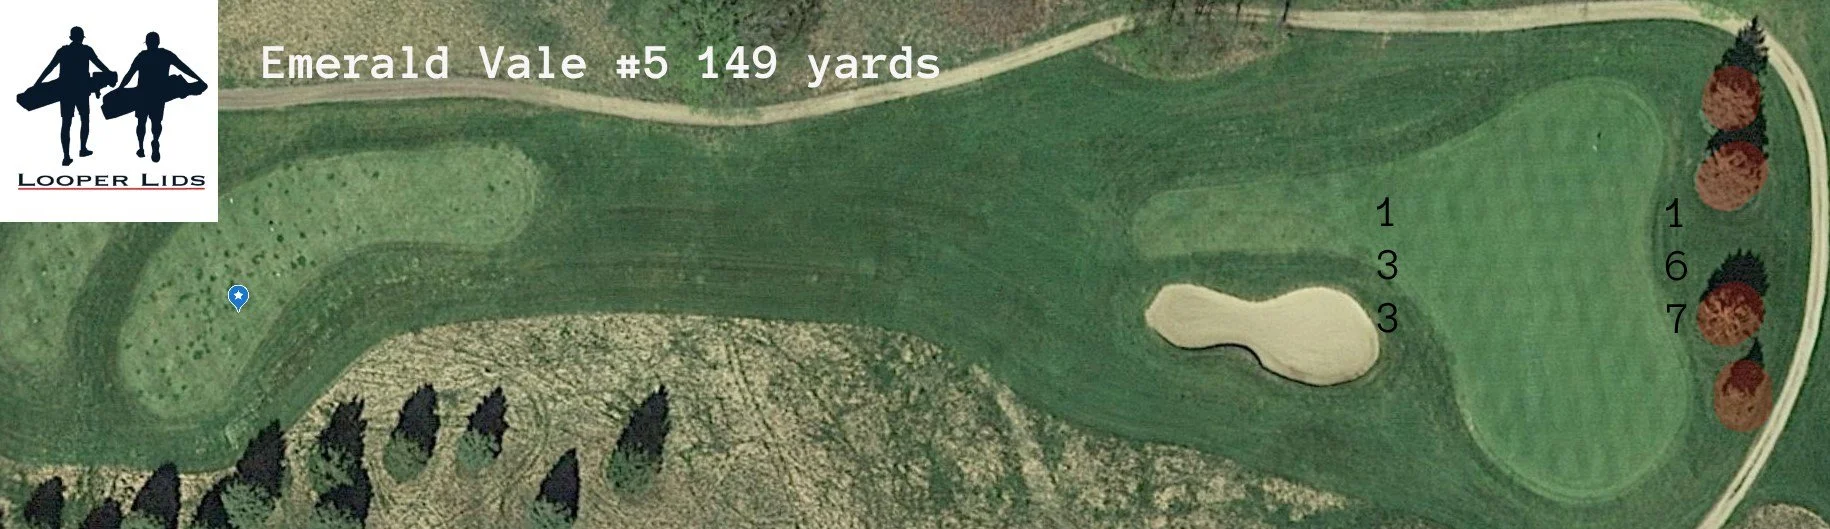
When mapping this hole out before writing this review, I had to triple-check to confirm it actually plays uphill—about 7 feet from tee to green. Based on my memory, I never would have guessed that.
The green is large but visually deceptive, tucked behind a sizable bunker that dominates your view off the tee. From the back side of that bunker, the green slopes downhill before flattening out and then gradually rising again toward the back edge.
Staying consistent with the theme at Emerald Vale, long is a bad miss here—four large pines guard the back of the green and make for a tough up-and-down. The hole also slopes somewhat severely from right to left.
Take all that into account and your best play is to hit something safely to the middle of the green, two-putt, and walk off with your par.